
THE FUNDAMENTALS OF BREAD MAKING
| Making bread requires little more than a pair of hands, an oven and patience. The recipe for success is simple; time and warmth are all it takes to transform a few basic ingredients into a springy, silky dough that bakes to a crackly, crusted loaf. It is like most things, easy when you know how, with practice making it perfect. If we had to choose one single phrase that we feel is essential to bread making, it would be this: bread is alive. It is a living, growing | entity and above all, the product of its ingredients and its surroundings; it responds, just as we do, to its environment. ''Treat rising dough as if it were human" advices an old English farmhouse cookery book. While the use of scales, timers and thermometers is advised, remember observation is the baker's traditional tool. The more you make a bread, the better you would get. Your mistakes are rarely irreversible and inedible. |
Essential Ingredients and Techniques
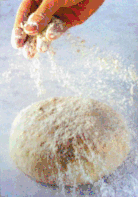
Flour is the main ingredient of most breads, accounting for about three-quarters of the finished loaf. The flour you choose will give your bread its individual character. Organic flours from independent mills will make you experience the taste and texture of a truly great homemade bread.
The choice of flour affects not only the quality of the baked bread but also the bread making process. Flour will absorb more, or less, liquid according to the variety of wheat that it was made from, where it was harvested, and how it was milled. Such variables are compounded by the humidity in the air - on a damp day, flour will absorb less liquid than on a dry one.
The choice of flour affects not only the quality of the baked bread but also the bread making process. Flour will absorb more, or less, liquid according to the variety of wheat that it was made from, where it was harvested, and how it was milled. Such variables are compounded by the humidity in the air - on a damp day, flour will absorb less liquid than on a dry one.
Flour Generally refined flour is used to make bread. It contains enough gluten to make the framework for the loaf. Bread flour, which contains stronger gluten, makes excellent bread. Wholemeal flour can also be used to make certain kinds of breads.

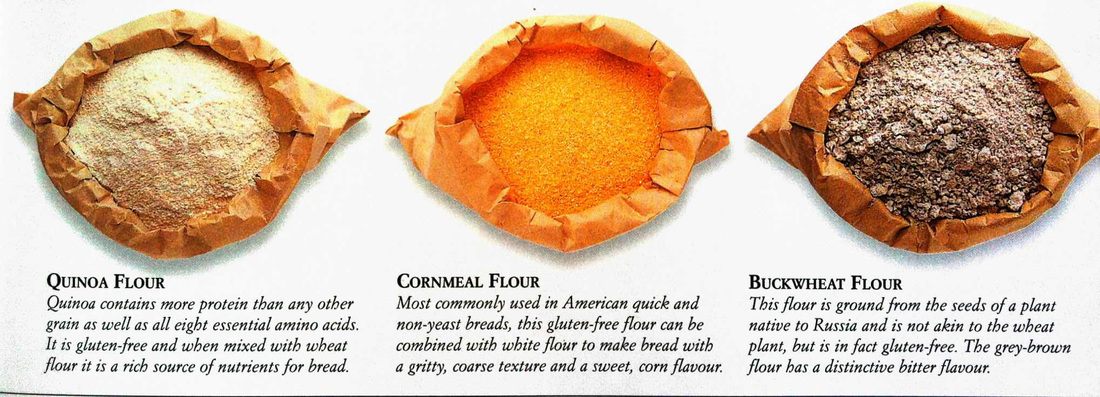
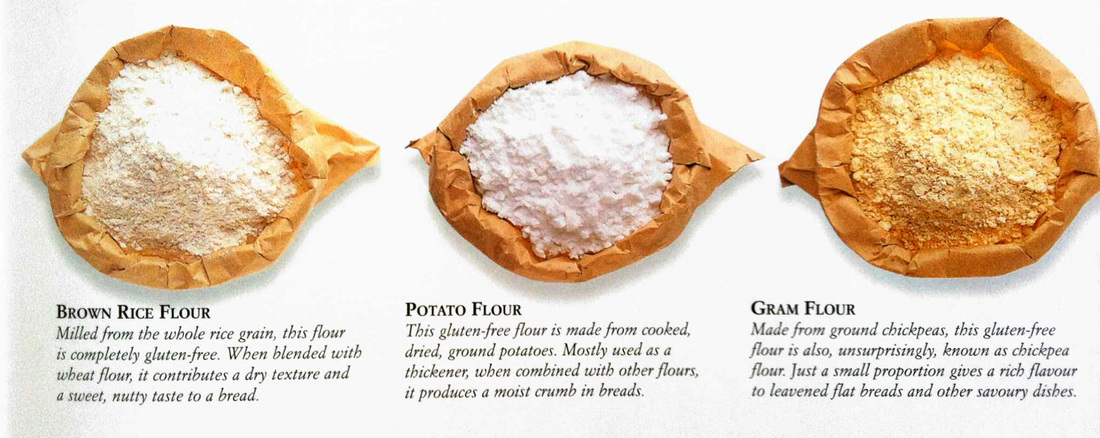
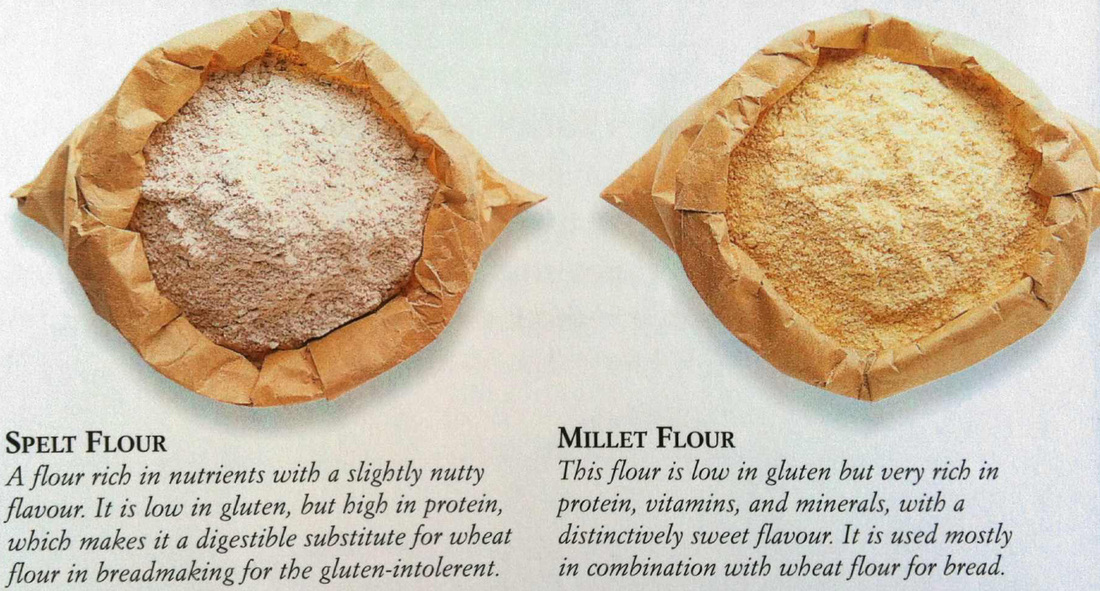
Low Gluten & Non - Gluten Flours
Sugar accelerates the fermentation process of bread dough by providing additional food for the yeast culture. However modern yeasts do not need sugar to become active. Sugar is no longer a necessary ingredient in bread recipes, but it is used to enhance a bread's flavour, texture and crust colour.
Salt improves flavour and texture. It controls yeast action so that the dough does not rise too quickly. The presence of salt in dough inhibits fermentation, which strengthens the developing gluten. Too much salt slows down the rising too.
Yeast is the leavening agent in the bread. When the tiny yeast plants feed on sugar, they produce carbon dioxide gas, which makes the dough rise.
Yeast comes in two forms, compressed and granular. The compressed yeast cakes are moist and must be kept under refrigeration or frozen. Granular yeast would keep longer if stored in a refrigerator.
Fat used in bread could be lard, a hydrogenated fat, butter, margarine, or cooking oil. The fat used in bread increases tenderness and volume, improves texture, flavour and keeping (storage) quality; it also contributes to the golden brown colours of the crust.
Liquid activates the yeast when it is at the correct temperature, and it gives life to the flour by transforming it into dough. For a loaf with an extra tender crumb, water can be replaced with milk. Different kinds of milk, such as fresh milk, buttermilk, evaporated milk or dry milk, may be used. Milk in any form increases the food value of the bread and also its quality. Bread made with water has a nutty flavour and a crispier crust than bread made with milk. Water in which potatoes are cooked can also be used, as the starch in it helps give the bread a nice hard crispy crust and a good brown colour.
Other Ingredients eggs, fruits, nuts and spices.
How To Begin
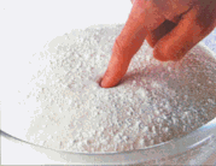
Measuring the ingredients
Precise proportions and accurate quantities of leavener, water, flour form the foundation upon which all good bread is based. The leavener or the rising agent is the key to transforming simple ingredients into a risen bread.
Precise proportions and accurate quantities of leavener, water, flour form the foundation upon which all good bread is based. The leavener or the rising agent is the key to transforming simple ingredients into a risen bread.
| ''Accuracy is crucial'' when making bread. Use a kitchen scale clearly marked in the metric or imperial measurements for weighing flour and other ingredients. Follow either metric or imperial measurements throughout the recipe. These two systems are not interchangeable. | So make sure you stick to one system throughout. Weigh all the ingredients carefully before you begin. Use a jug with clearly marked units for measuring liquids. Place on a flat surface and bend down to eye level with the measured mark to pour into the jug. |
Preparing the yeast
Water Temperature
The ideal temperature for preparing yeast is 37 deg centigrade. The easiest method for achieving this is to mix two-thirds cold tap water with one-third boiling water. The water should be comfortable to touch - not too hot, not too cold. An instant read thermometer provides a fail-safe method of checking the water temperature.
As a living organism, yeast is very sensitive to temperature. The temperature of the liquid you use to dissolve the yeast and to make the dough is crucial: too hot and the yeast is killed, too cold and its growth is inhibited.
Cool water can be helpful when conditions in the kitchen are extremely warm and you wish to slow down the rising process. Adding cool water to the yeast will inhibit the rate of fermentation, allowing the bread to rise at a normal rate when the room temperature is above normal.
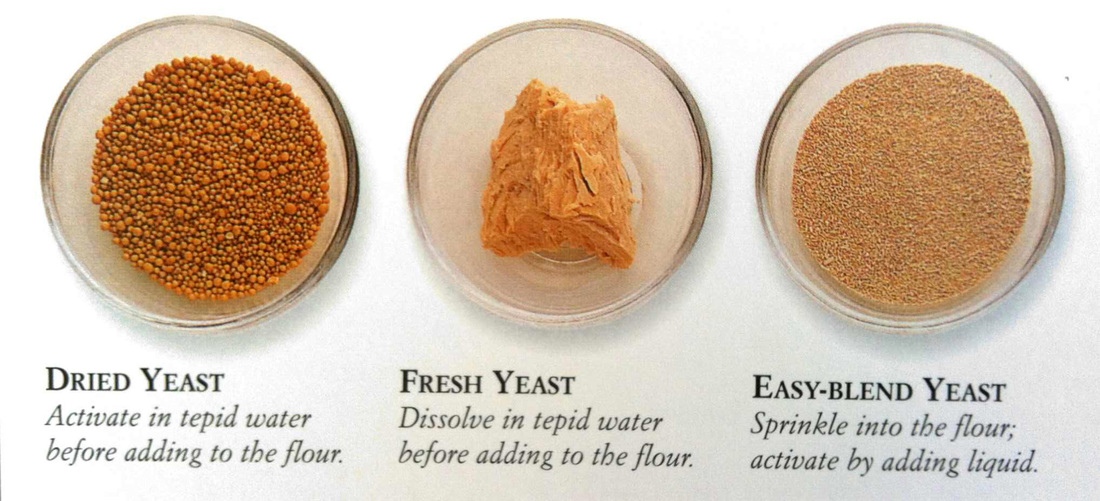
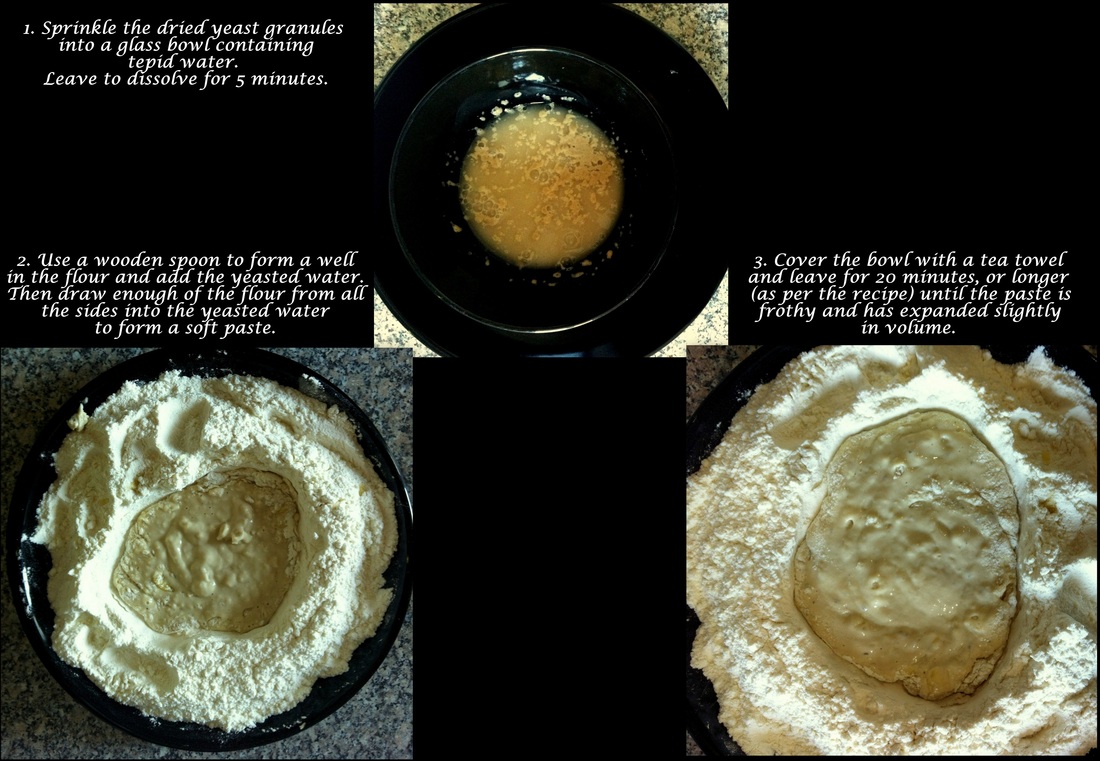
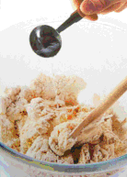
| Yeast is a living organism, which relies on the sugar and starch present in the flour to live and grow. Yeast produces carbon dioxide gas as it grows; this gas causes the bread dough to rise. Once activated in water, yeast will live for up to 15 minutes before it must be added to the flour, the food source it requires to stay alive. Both ''dried and fresh'' yeast must be dissolved in tepid water to activate. This should be done just before adding the yeast to the flour. AVOID using metal bowls or utensils to prepare the yeast. Sometimes metal will impart an aftertaste to a yeasted mixture. | Using Dried Yeast Sprinkle dried yeast granules into a small bowl containing tepid water; leave to dissolve for 5 minutes. Once the yeast has dissolved stir the mixture with a wooden spoon. The mixture is ready to be added to the flour. Using easy-blend Yeast To use easy blend yeast, sprinkle it directly on the flour. The yeast will activate once the liquid has been added. The standard method of mixing the dough must be followed, since easy blend yeast can't be used with the sponge method. Using fresh Yeast Crumble the fresh yeast using a wooden spoon in a small glass bowl and add the water to it. As a general rule, the amount of water added to dissolve the yeast will be about a quarter of the water mentioned in the recipe. Use a wooden spoon to cream the yeast until it dissolves in the water and forms a smooth, thoroughly blended paste. The mixture is now ready to be used. |
Using a starter
| Starters offer an alternative method of preparing the yeast before mixing a bread dough. A portion of the yeast is prepared and then combined with the water and flour. This mixture is then left to ferment for between two hours and five days, which results in a bread with an open, airy texture and a superior flavour. Breads made with starters require advance planning | because additional time is needed to allow the starter to ferment. Once the starter has fermented, it is ready for the mixing step. The main difference between the starter methods described here is time ; the ingredients are the same - flour, water and yeast. |
Mixing
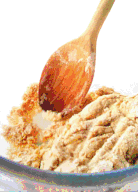
The ''quantities of liquid'' mentioned in recipes can never be more than guideline or general indications. The mixing techniques suggest that you hold back a proportion of liquid and add it as needed. This method acts as a safeguard against overly wet dough and the consequent need to add extra flour, which upsets the balance between the flour, salt and yeast.
If you require a little more liquid than stated in the recipe, do not hesitate to add it; your aim is to produce a dough conforming to the consistency specified in the recipe, be it firm, soft or wet.
Observing and understanding the condition of your dough, and what it requires, is the key to successful bread making.
| The primary objective of mixing is to combine the basic ingredients into a soft, pliable dough ready for kneading. The quantity of liquid required will often vary according to the type of flour used, as well as the level of humidity and temperature on the day of bread making. A little less, or little more liquid, than mentioned in the recipe may be required depending on the factors mentioned above. | Add extra liquid, one tablespoon at a time; it is best to err on the side of too soft than too dry. Take note of the consistency of the dough described in each recipe and add additional liquid accordingly. The sponge method adds a period of fermentation (specified in the recipe) before mixing. This results in a bread with a lighter crumb and a less yeasty flavour. |
Gradually pour in half of the remaining liquid while mixing in the same flour from the sides of the bowl. As the water is added, the texture of the combined ingredients will change from a crumbly mixture, to a shaggy, slightly sticky mass that will begin to come away from the sides of the bowl and form into a ball.
Add the rest of the water as needed, to achieve the consistency specified in the recipe. The dough should remain soft and should not be too dry before it is transferred to the floured surface for kneading.
Add the rest of the water as needed, to achieve the consistency specified in the recipe. The dough should remain soft and should not be too dry before it is transferred to the floured surface for kneading.
Kneading
| Essential for an open-textured, full flavoured bread, kneading performs a crucial function in preparing a dough to rise. First, it completes the mixing process by distributing the activated yeast throughout the dough. Continued kneading then allows the flour's | proteins to develop intogluten, which gives dough the ability to stretch and expand.Starches are broken down to feed the yeast, which creates bubbles of carbon-di-oxide gas. These bubbles cause the dough to rise. |
A bread dough is kneaded similarly to any roti / paratha dough. Ensure that while kneading it, you don't stretch the dough so much that it tears in the middle (this could hamper the gluten formation, making the dough tough).
To achieve a good crumb (spongy inside of the bread), the dough needs to be kneaded well for atleast 10 minutes.
A final test to ensure that the dough is ready for the next step is, to take a hand-full of dough and stretch it into a small sheet with your fingers. The dough should stretch easily and smoothly, just like a good piece of bubble gum just before you blow that bubble.
Think about it, it's the same idea. You want a big elastic mass to trap the gas and expand, containing the gas until baking makes the dough strong enough to hold it's shape.
Rising & Knocking Back
|
|
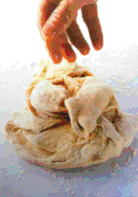
Once the dough has risen completely, knock back OR deflate the dough by pressing down with your knuckles. Allow the dough to rest for 5-10 minutes and then turn the dough out of the bowl onto a lightly floured working surface.
Shaping & Proving
| After a dough has been knocked back and rested, it is ready to be shaped. Each stage of any shaping process requires careful attention - handle the dough gently and avoid over shaping or excessive reshaping. Apply pressure evenly and allow the dough to rest if it begins to tighten or resist. Transfer the shaped dough to a prepared baking sheet to prove. | Proving allows the dough to rise for a final time before baking. Shaped dough is left to rise until doubled in size (unless mentioned otherwise in the recipe) on a prepared baking sheet or in a tin. Avoid over-proving by testing for doneness ; press on the dough slightly with your fingertip. The shaped dough is ready to bake when it feels spongy rather than firm, and the indentation made with your fingertip springs back slowly. DO NOT let shaped dough spread or deflate ; over-proving can cause the dough to collapse when touched or slashed, or when its placed in a hot oven. |
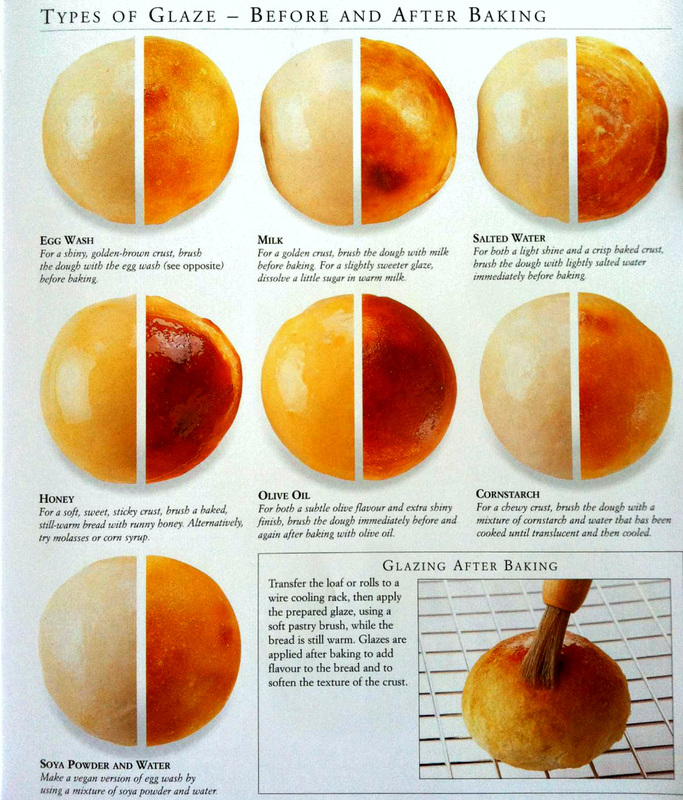
Glazing
| Adding the finishing touches to a bread is usually done after proving. Glazes can affect the baked taste and texture of the crust as well as the appearance. When a glaze is applied, either before or after baking, depends on the glaze and the effect desired. Some glazes can be brushed on both | before and after baking. When applying a glaze before baking, be careful not to ''glue'' the loaf to the rim of the tin or the baking tray. This will not only make it difficult to remove the loaf from the tin, but can prevent the loaf from expanding fully in the oven. |
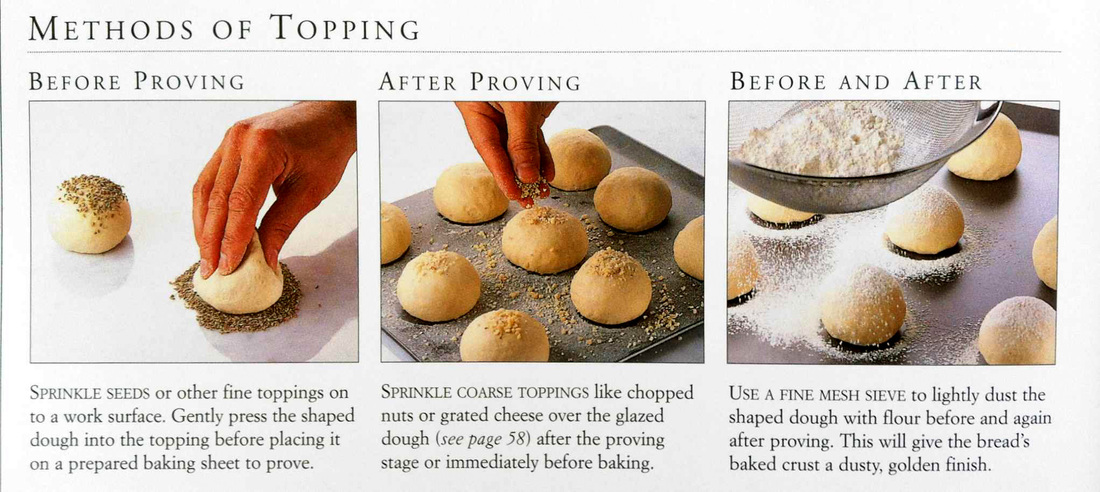
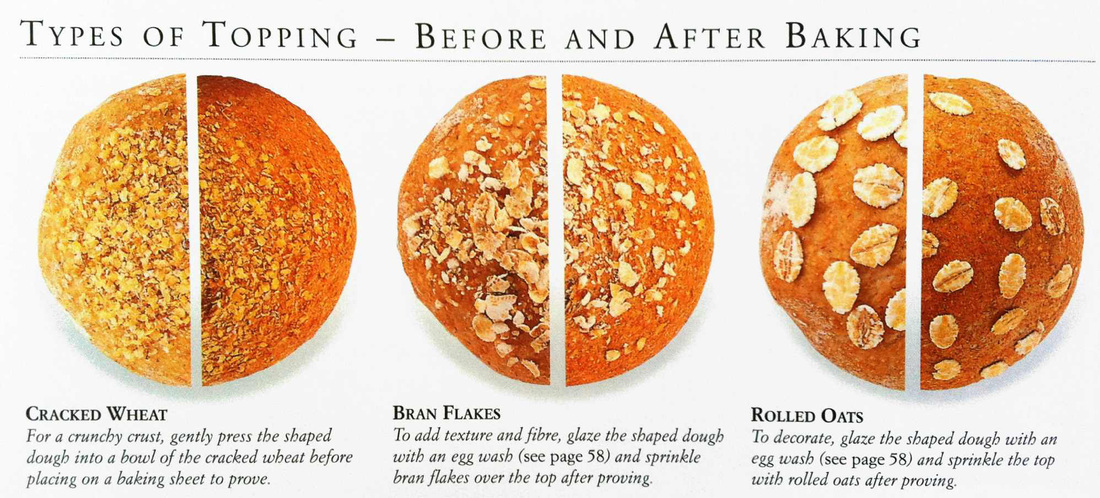
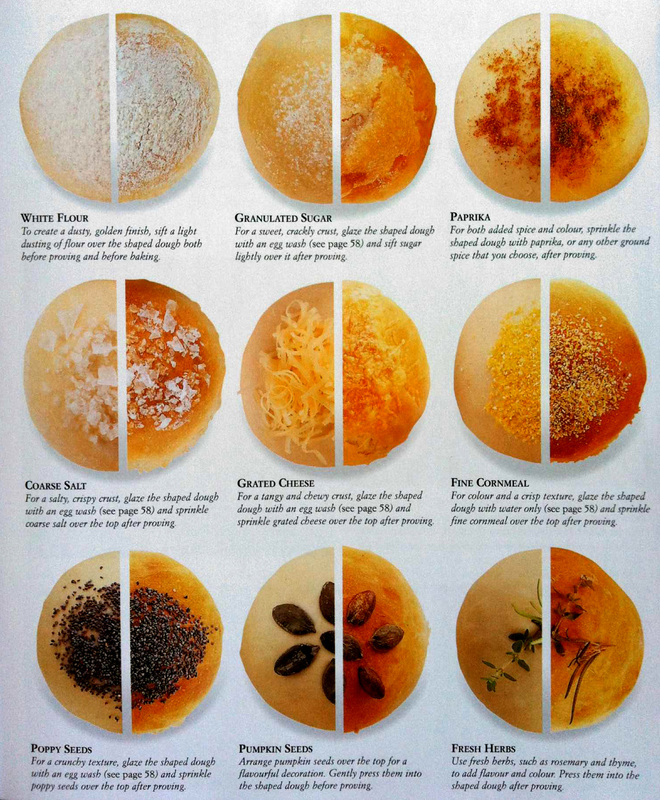
Toppings
| Toppings offer many ways to finish a bread before baking. If a flavouring has been used to make the dough, then the loaf may be topped with the same ingredient, providing a clue to the hidden flavour inside. Toppings can also be used to complement a bread or simply to add a decorative touch. | Toppings can be applied at different times : before proving, the dough can be rolled in the topping; after proving, it must be handled more gently so it is best to sprinkle the topping over it or use a sieve to create a light dusting. |
Baking
| Baking is the culmination of the bread making process, when all of your hard work and patience are rewarded. For a successful bread, follow the guidelines : use a good thermometer to regulate the temperature of the oven; preheat to the correct temperature before placing the bread in the oven to bake; | make a note of the exact baking time before beginning; and always use a kitchen timer to keep track of the time. An important key to proficient baking lies in knowing your oven and being able to control its temperatures closely - each oven is slightly different and has its own peculiarities. |
Baking stages
| When the bread is placed in the hot oven, the heat turns the moisture in the dough to steam, causing the bread to rise rapidly in the first 20 minutes of baking. The heat then penetrates the bread, killing the active yeast cells and allowing the exterior crust to form. | As the exterior crust forms, the natural sugars in the dough caramelize, creating a golden brown colour. The baking time is specified in each recipe. High humidity, however, can sometimes extend the required baking time and needs to be taken into consideration. |
Characteristics of a good bread
| Shape Crust Volume Texture Grain Colour of crumbs Flavour Aroma | Well-proportioned with an evenly rounded top. Uniformly brown but with a slightly darker top; thick, tender and smooth, not splitting or bulging. Light in weight in proportion to the size. Tender elastic crumbs, free from dryness or doughiness. Small cells evenly distributed. Free from dark streaks; depending on the ingredients used. Free from sourness or bitterness. Must be free from musty, foreign or sharp odours. |
PROBLEM SOLVING
| A less than perfect loaf of bread generally begins with a less than perfect dough. Infact the most common mistake in bread making is producing a dough that is too dry. A dry dough is stiff and hard and will remain a solid, heavy lump that will resist proper kneading, rising, proving and shaping. It is impossible to specify an exact quantity, or indeed precise rising times for each recipe when flour, temperature and humidity | vary so greatly from kitchen to kitchen, and region to region. Carefully follow the recipe instruction for the dough consistency, as well as the kneading, rising and proving times. However, remember that bread dough is influenced by its environment, Therefore, it is important to take this factor into account and adjust the instructions as necessary. Use these guidelines to help make a perfect dough. |
Achieving The Right Consistency
| The ideal consistency for most doughs is firm, but moist. A dough should feels oft and slightly sticky after mixing, but should become smooth and elastic as it is kneaded. Resist adding extra flour until you are certain that the dough is unmanageable. Adjustments are best made at the mixing stage, but additional water or flour can be added to the dough at the kneading stage as well.
| DRY DOUGH AT THE KNEADING STAGE
WET DOUGH AT THE KNEADING STAGE
|
COMMON PROBLEMS IN BAKED BREADS
| PROBLEM CLOSE - TEXTURED, DENSE CRUMB ___________________________________________________________________________________________________________ A FLAT AND SPEAD - OUT BREAD ___________________________________________________________________________________________________________ CRACKS ON SIDES OF LOAD ___________________________________________________________________________________________________________ DRY PATCHES OF UNCOOKED DOUGH ___________________________________________________________________________________________________________ | POSSIBLE CAUSES
________________________________________________________________________________________
________________________________________________________________________________________
________________________________________________________________________________________
| REMEDIES

|
Poorly shaped loaf
- Inexperience in handling the dough.
- Too much or too little flour.
- Dough too light / over-proven before baking.
- Oven not hot enough or unevenly heated.
Coarse grain
- Dough not kneaded enough.
- Allowed to rise too much before baking.
- Oven temperatures too low.
Streaks
- Dough allowed to dry on top during the rising period.
- Dough not kneaded enough.
- Dry flour folded into the loaves during the shaping.
- Dough too heavily greased on top during rising.
Crumbly
- Too much flour.
- Not enough kneading.
- Allowed to rise too much before baking.
Crust splitting on top or sides
- Oven too hot or oven heat uneven.
- Loaves placed too closely together during baking.
Soggy or heavy
- Too much flour.
- Insufficient rising or baking.
- Poor yeast or poor flour.
Off-flavour
- Old yeast.
- Dough allowed to rise for too long.
- Too high temperature during rising.
- Too slow or incomplete baking.
 RSS Feed
