
This is the ONE and ONLY chocolate dessert I can feast on! No other cake like this one, can say ‘’its time to celebrate’’! And what better reason than to make it on our anniversary. The recipe looks like a long tedious one, but trust me it isn’t. Its actually a lot of fun to make this cake. And what better rewards than an earshot grin of satisfaction from your better half!
A bit about this cake -
As its name implies, Black Forest Cake comes from the Black Forest region of Germany. The first written recipe for this very popular cake appeared in 1934, and there are many theories as to its origin.
The cake is named not directly after the Black Forest (Schwarzwald) mountain range in south-western Germany but rather from the specialty liquor of that region, known as Schwarzwälder Kirsch(wasser) and distilled from tart cherries. This is the ingredient, with its distinctive cherry pit flavor and alcoholic content, that gives the cake its flavor.

| PREP TIME TOTAL TIME PORTIONS | 15 - 20 minutes 1 - 1.5 hours 8 - 10 (cake lovers) | OVEN TEMPERATURE 180 deg C OR 350 deg F BAKING TIME 20 - 25 minutes |
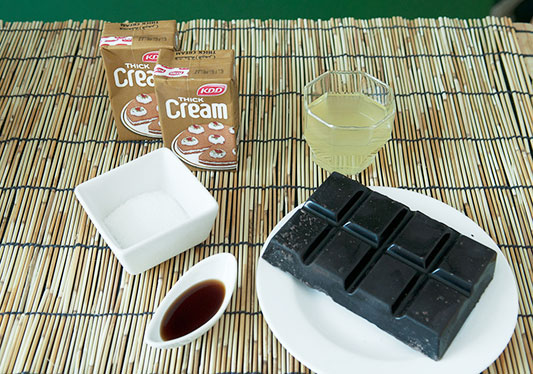
| INGREDIENTS Refined flour Cocoa Powder Salt Eggs Sugar Vanilla Essence Butter Cherries Syrup Sugar Cream Sugar Vanilla Chocolate | QUANTITY 60 gms 30 gms, any good brand 1/4th tsp 4 large, should be at room temperature 135 gms 2 tsp 45 gms / 3 tbsp 1 tin, in syrup 240 ml, the same syrup from the cherries tin/bottle should be used 50 gms Double / Whipping cream, has to be ''chilled'' 35 gms 1 tsp 100 gms bar, dark chocolate, semi-sweet / bitter would also do. It also has to be ''chilled'' |
 |  |
RECIPE
Put the oven for pre heating at 180 deg C or 350 deg F.
Make sure you have all the ingredients ready and at room temperature before starting with the cake. Ingredients have to be at room temperature as they blend very easily giving you the perfect result.
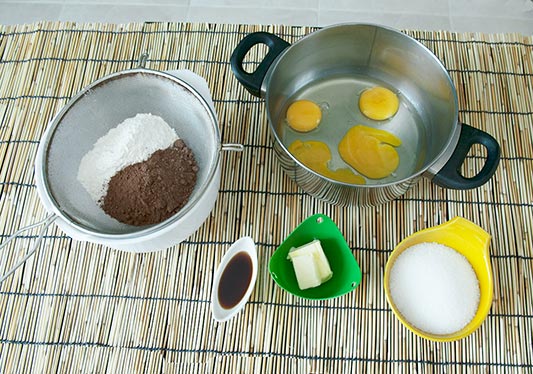
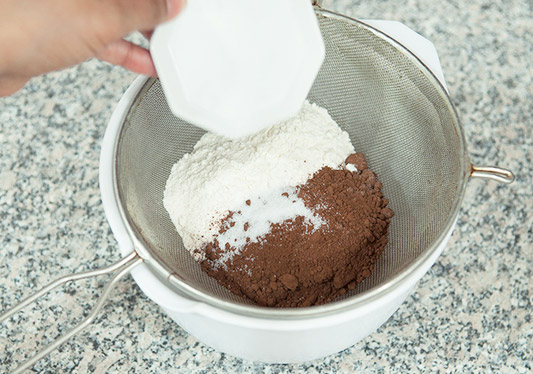
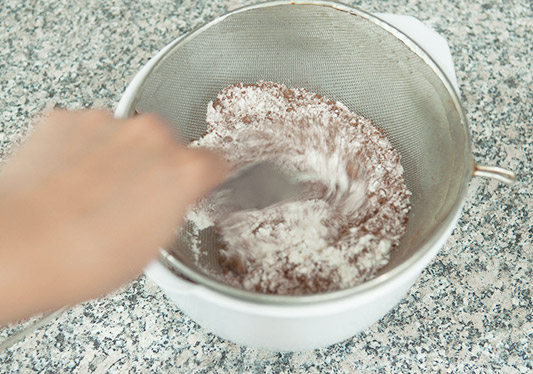
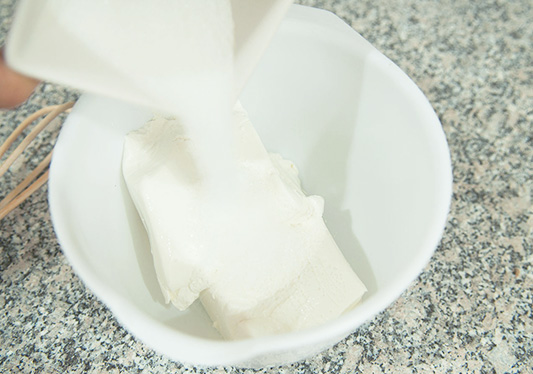
Ensure the required exact amount of refined flour, Cocoa Powder and salt are ready in a sieve.
The eggs are at room temperature and in a vessel that is big enough for you to whisk them easily but also one that would fit in another larger vessel (acting as a bain marie). The butter also has to be at room temperature. It is much easier to handle it that way.
The cream and chocolate slab don’t have to be used till the end of the recipe, so make sure these ingredients are sitting in the fridge and are very well chilled to be used later. Cream whips well when it is nice and cold. And chocolate melts very easily, even if it is over handled, it becomes smudgy. Hence both these ingredients have to be chilled for use.
Strain the cherries and keep aside the syrup, as this would be used to moisten the cake.
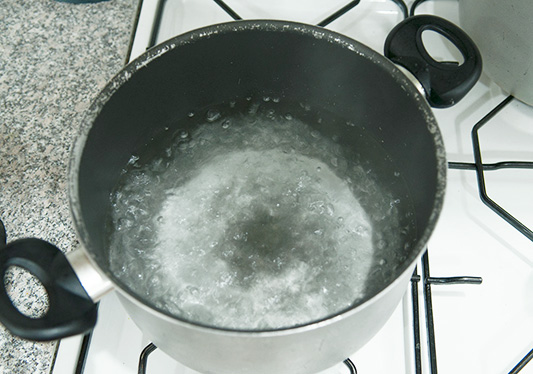
Keep a large casserole filled 3/4th with water to boil. This casserole has to be large enough for the casserole with eggs to just fit over it, making it a bain marie.
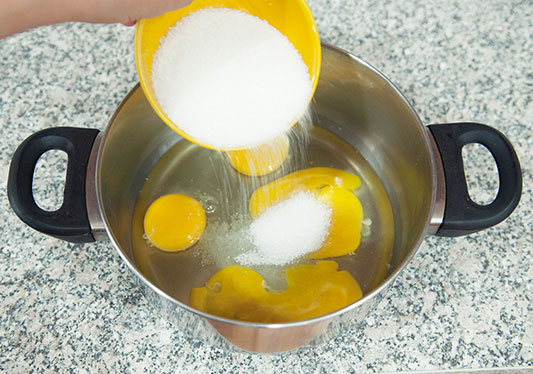
In a medium sized vessel, crack the room temperatures eggs, add 135gms of sugar to the eggs, and whisk them well for 3 – 4 minutes, till the sugar is slightly dissolved.
In a medium sized vessel, crack the room temperatures eggs, add 135gms of sugar to the eggs, and whisk them well for 3 – 4 minutes, till the sugar is slightly dissolved.
 |  | 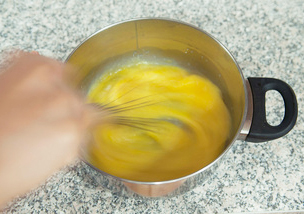 |
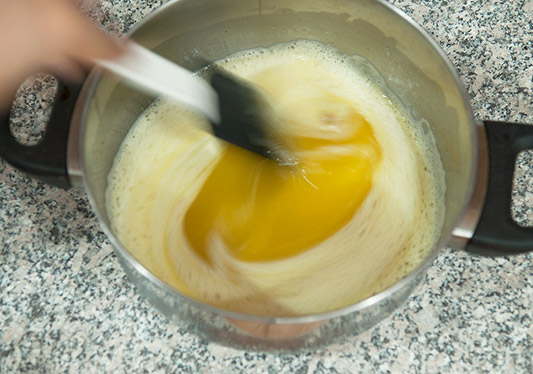
Once the water starts to boil, place this casserole on the larger one with boiling water in it. Make sure the bottom of the casserole with eggs in it is NOT TOUCHING the water.
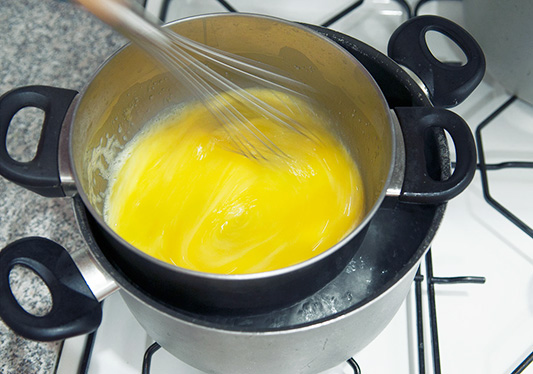
The eggs have to get cooked with just the steam from the boiling water, or else they will curdle in no time. Once the casserole with the eggs is placed in the bigger casserole, make sure the eggs are whisked continuously at a medium speed. The eggs have to be kept over the steam till the sugar is dissolved, and the eggs have become luke warm, this shouldn’t take more than 3 – 5 minutes maximum.
DO NOT let the eggs over cook or over heat, as they would curdle in no time. Once the eggs are ready, they would become slightly frothy, thicker and lighter in color.
 |  |  |
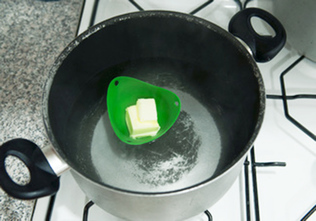
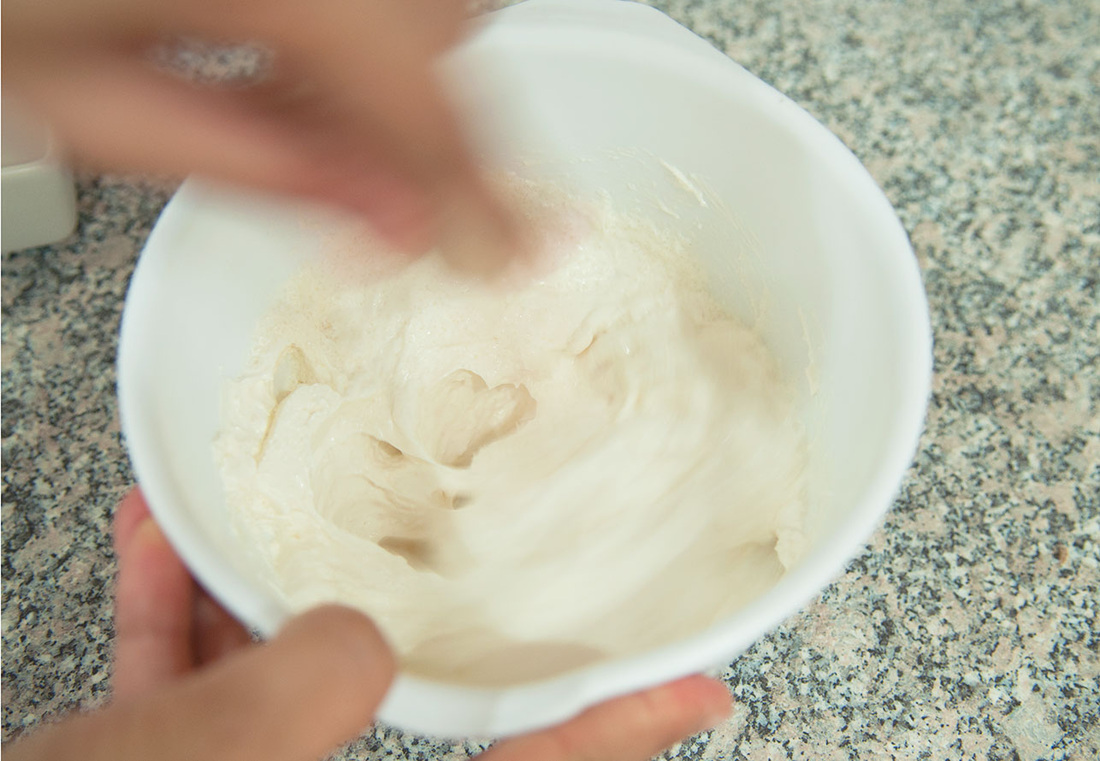
Once the eggs casserole is removed from over the boiling water, place the butter in it to allow it to melt. If you microwave butter, the milk solids and the water content would separate making it difficult to handle. Hence melting it on hot water is a preferable way.
Once the eggs are taken off the boiling water, whisk them slightly to allow them to cool a little.
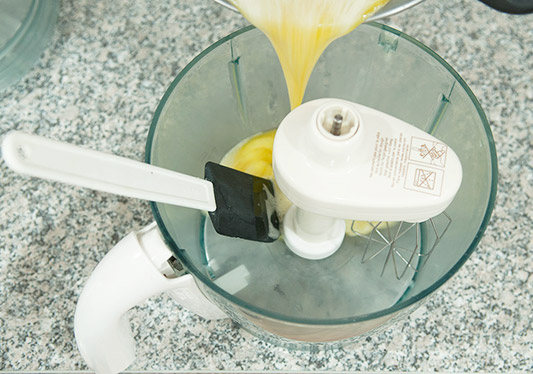
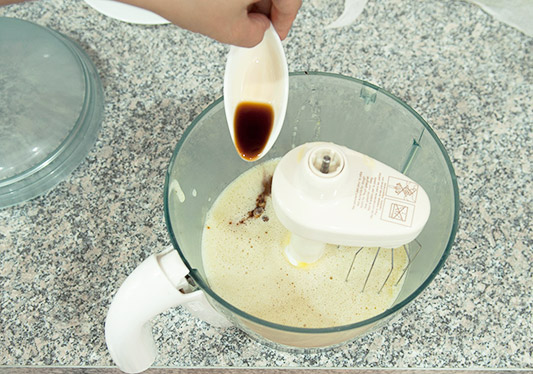
Put them in a food processor, add 2 tsp of vanilla essence and whisk for 4 – 5 minutes on the highest speed till they become pale yellow, thick and frothy. If you pull out a spatula full of whisked eggs and pour them, they should fall off like a ribbon.
Put them in a food processor, add 2 tsp of vanilla essence and whisk for 4 – 5 minutes on the highest speed till they become pale yellow, thick and frothy. If you pull out a spatula full of whisked eggs and pour them, they should fall off like a ribbon.
 |  |  |
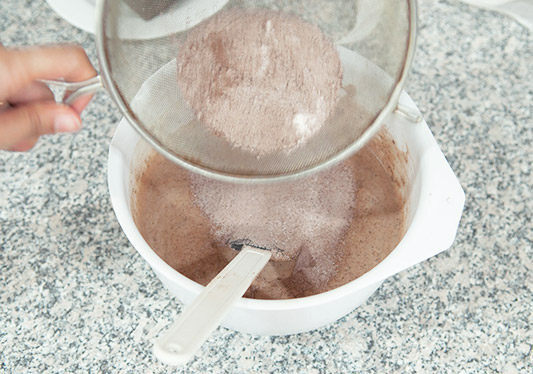
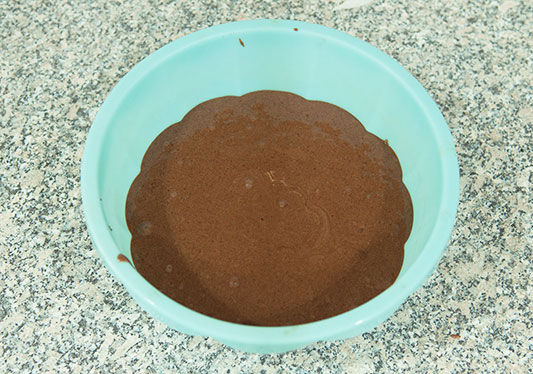
Till the eggs are getting whisked, sift the refined flour, cocoa powder and salt, making sure no lumps are left in the flour.
 |  |
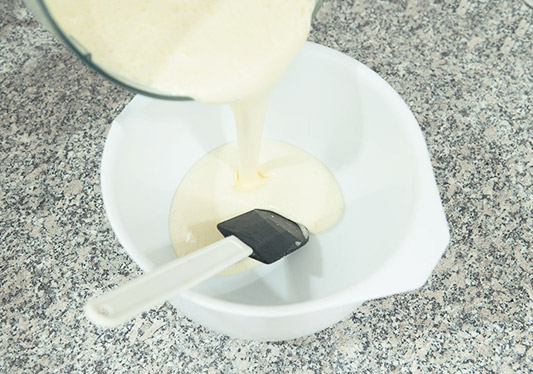
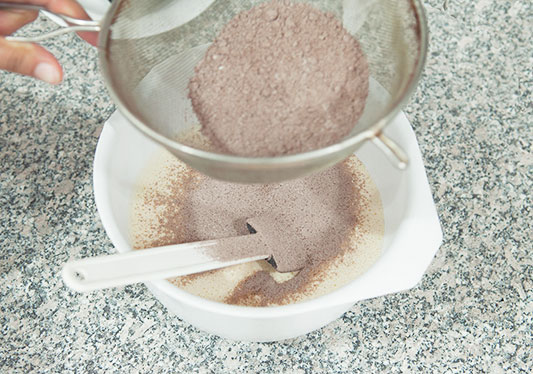
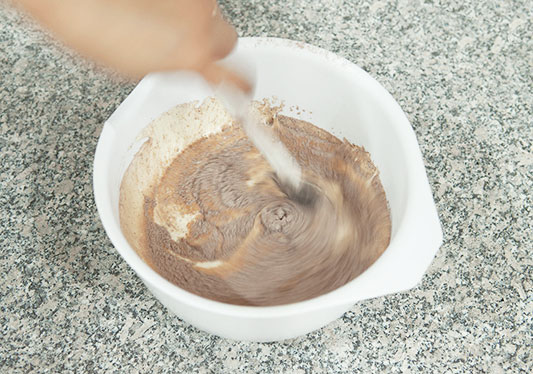
Pour the whisked eggs into a large bowl. Through the same sieve, sift about half the flour on the whisked eggs and mix the flour in the eggs with a spatula in the figure of eight. (move your spatula in the shape of 8, this not only ensures that the flour gets well mixed from all corners, but also doesn’t over mix or knead the dough avoiding the formation of gluten).
Once the first batch of the flour is mixed, add the 2nd half and mix it well using the same method.
Once the first batch of the flour is mixed, add the 2nd half and mix it well using the same method.
 |  |  |  | 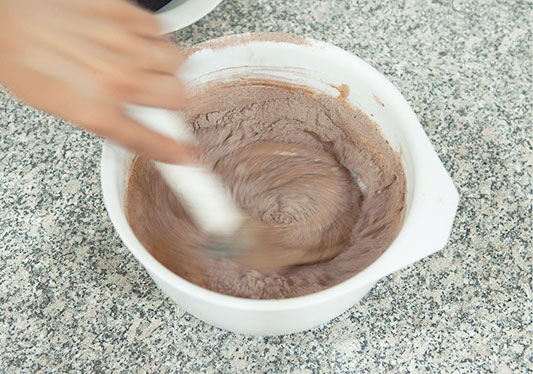 |
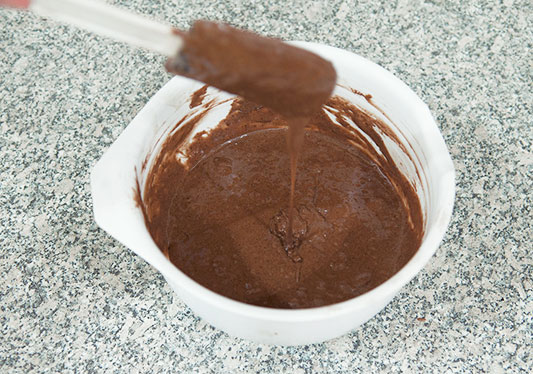
Once the batter is well mixed, allow it to sit for 2 – 3 minutes till the butter is prepared to be added to the whole batter.
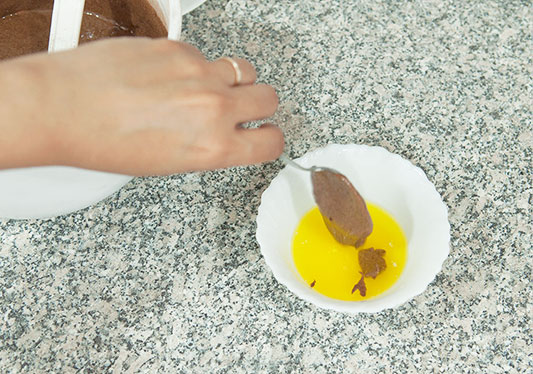
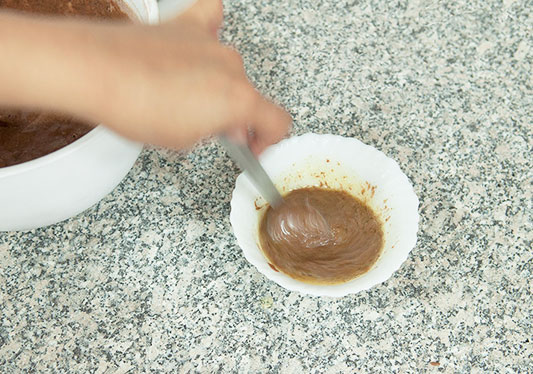
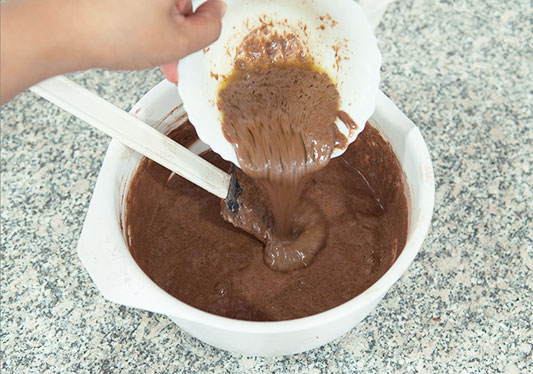
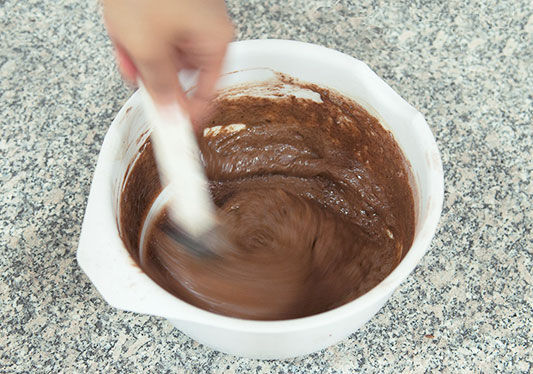
Add 1 spatula full of flour into the melted butter and mix it well. Now add this buttered batter back to the main bowl and again turn the spatula in the figure of 8 to make sure the butter is well spread. This would make mixing the butter into the whole batter very easy.
Add 1 spatula full of flour into the melted butter and mix it well. Now add this buttered batter back to the main bowl and again turn the spatula in the figure of 8 to make sure the butter is well spread. This would make mixing the butter into the whole batter very easy.
 |  |  |  |  |
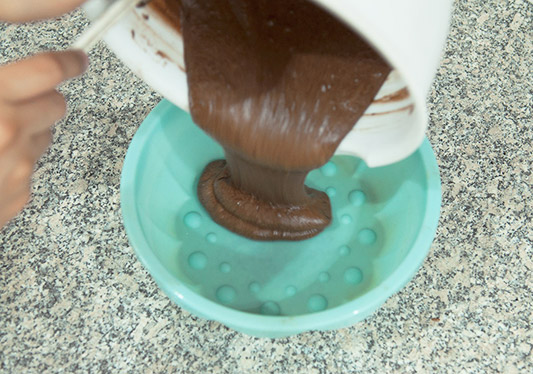
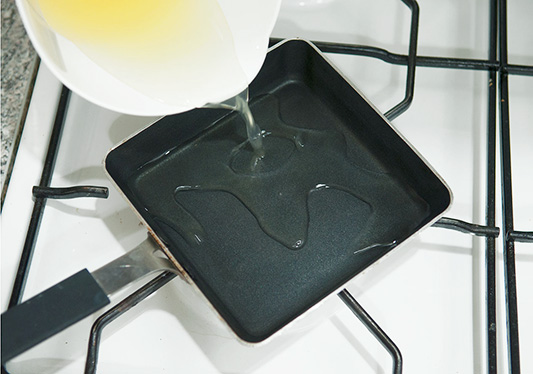
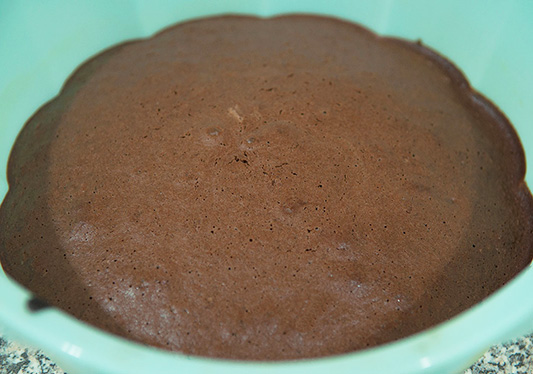
Pour this batter into a 9’’ cake tin and tap the tin a bit to make sure no air pockets remain.
Put the tin in the pre heated oven and bake for 20 – 25 minutes.
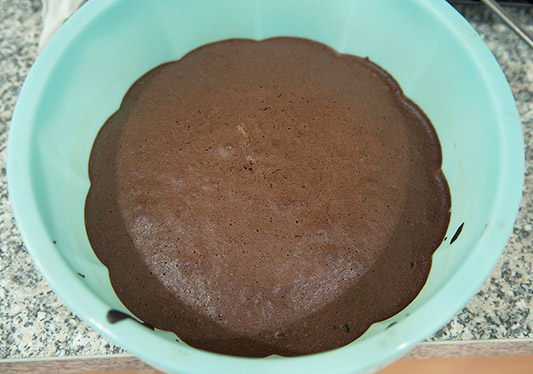
To test if the cake is ready, poke it with a tooth pick, if the tooth pick comes out clear then the cake is baked completely, but if some batter comes out with batter on it, then the cake needs to be baked a little longer.
Put the tin in the pre heated oven and bake for 20 – 25 minutes.
To test if the cake is ready, poke it with a tooth pick, if the tooth pick comes out clear then the cake is baked completely, but if some batter comes out with batter on it, then the cake needs to be baked a little longer.
 |  |
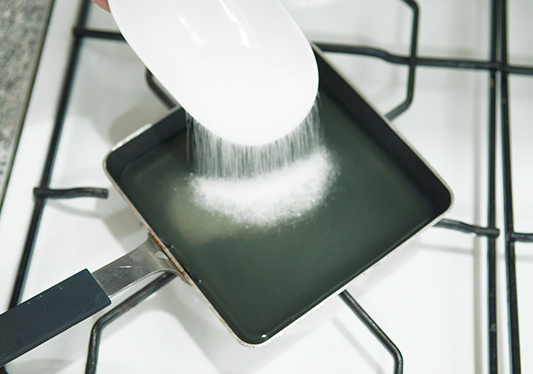
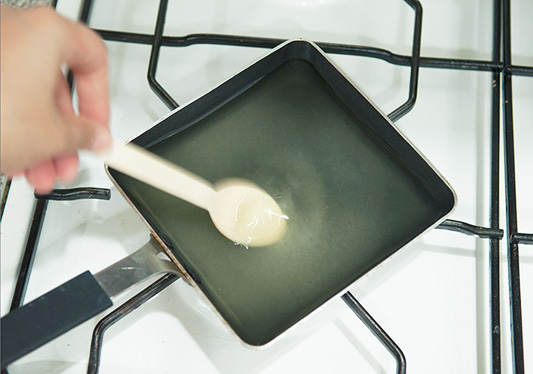
Till the cake is getting baked, pour 240 ml of the cherries syrup into a non stick pan, add 50 gms of sugar and on a low flame allow it to heat till the sugar melts completely. Set it aside to cool.
 |  |  |
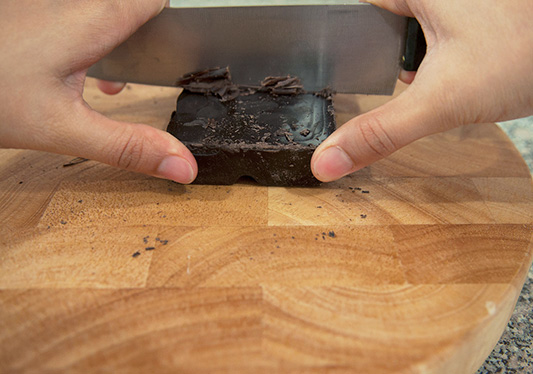
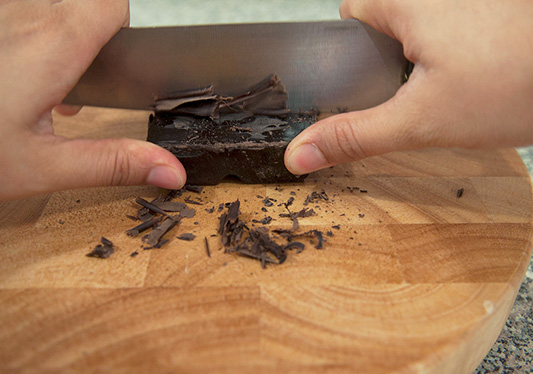
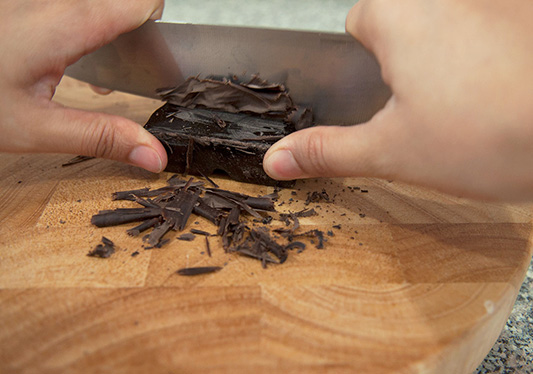
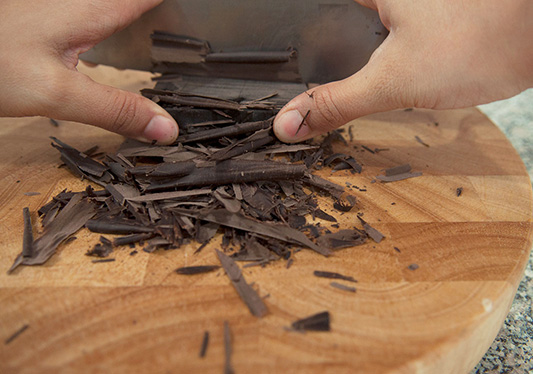
Remove the chocolate slab from the fridge.
Use a sharp knife to make the chocolate shavings.
Block the slab with both your thumbs and using the knife with enough pressure, slide if from the slab towards you. This would give you nice thin shavings.
DO NOT handle the chocolate slab too much as it would start getting softer, and that would definitely not give you the desired quality of shavings.
Also, as soon as the shavings are done, slide them on a plate using the knife, do not use your hands, as that would definitely melt the thin shavings. Once you have enough shavings, put them back in the fridge so that they don’t melt sitting at room temperature.
 |  |  |  |
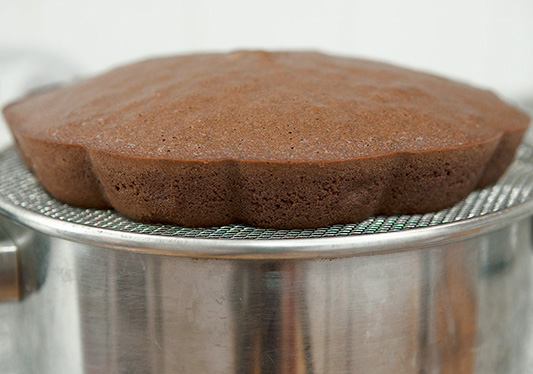
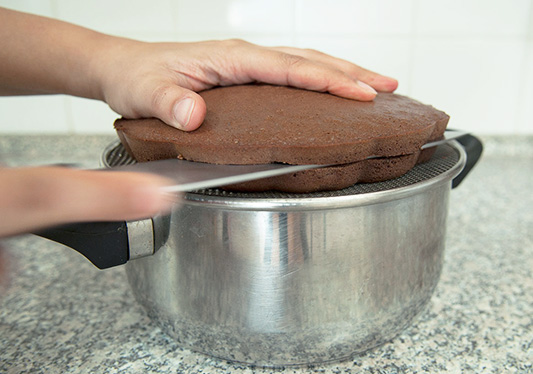
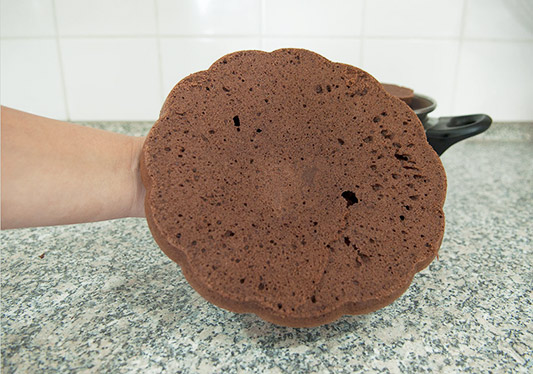
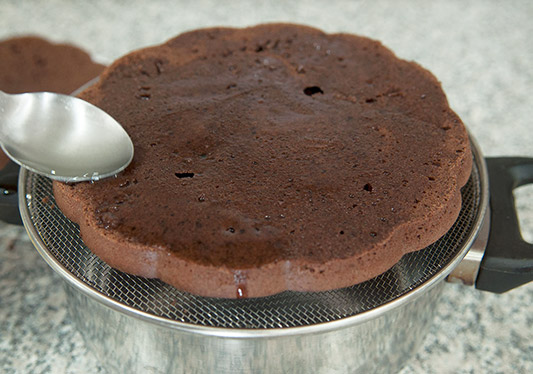
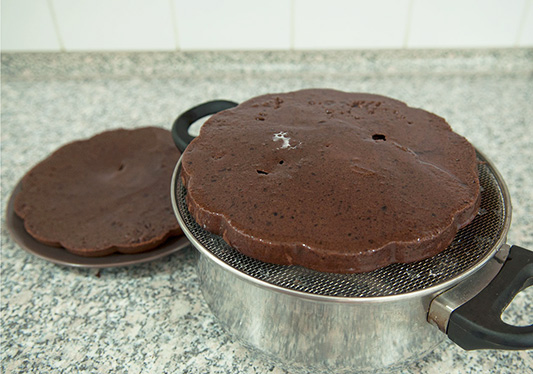
Once the cake is baked, remove it from the tin and place it on a wire mesh to allow it to cool, which would make it easier to slice.
 |  |  |
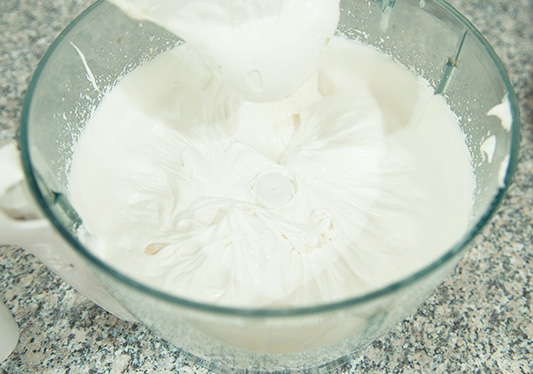
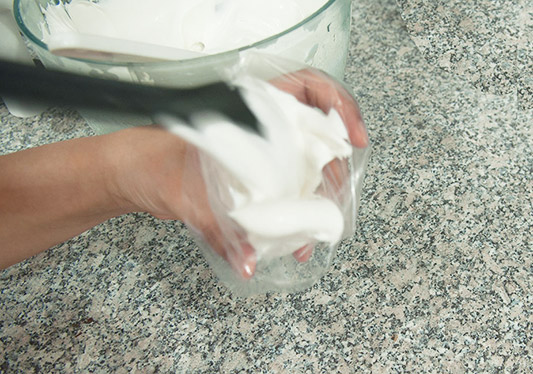
Till the cake is cooling down, pour 600 ml of chilled double / whipping cream in a bowl, add 35 gms of sugar and vanilla essence to it and whisk it for a few minutes till the sugar is partially dissolved in it. If the cream isn’t cold enough, refrigerate again for 20 – 30 minutes along with the wire whisk.
Pour this mixture into a food processor and whisk it on the highest speed for 4 – 5 minutes till you get stiff peaks.
Fill a piping bag with the whipped cream and refrigerate both the bag and the remaining cream for at least 15 – 20 minutes again till it has to be used.
Pour this mixture into a food processor and whisk it on the highest speed for 4 – 5 minutes till you get stiff peaks.
Fill a piping bag with the whipped cream and refrigerate both the bag and the remaining cream for at least 15 – 20 minutes again till it has to be used.
 |  |  |  |
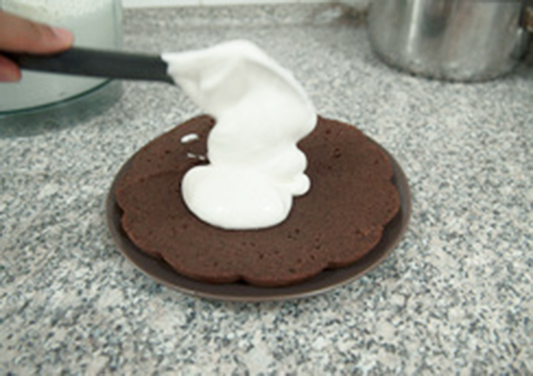
After the cake has cooled, slice it in even sized layers. Use about 60 – 80 ml of syrup on each of the layers and moisten them well. Make sure the syrup is spread well without leaving any dry patches or corners.
Set aside for at least 5 – 10 minutes allowing the cake to soak it well.
Set aside for at least 5 – 10 minutes allowing the cake to soak it well.
 |  |  |  |  |
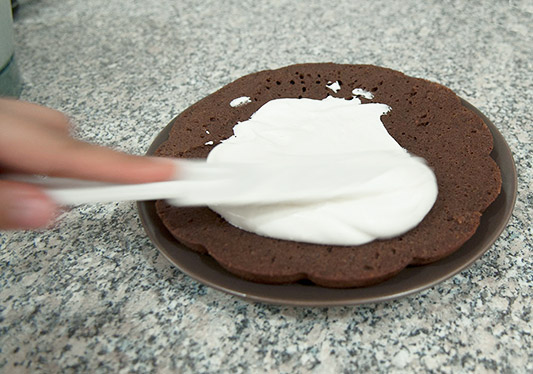
Now take a spatula full of whipped cream and place it in the center of the bottom layer of the cake. Spread it well and evenly with a flat spatula, making sure all sides are well covered.
Because Mitul doesn’t like cherries, I had to add chocolate shavings over the spread whipped cream. But normally chopped cherries are added over the whipped cream on the base layer.
Make sure you don’t over use the cream or the cherries, as after placing the top layer, it would get pressed and any excess would ooze out from the sizes.
 |  | 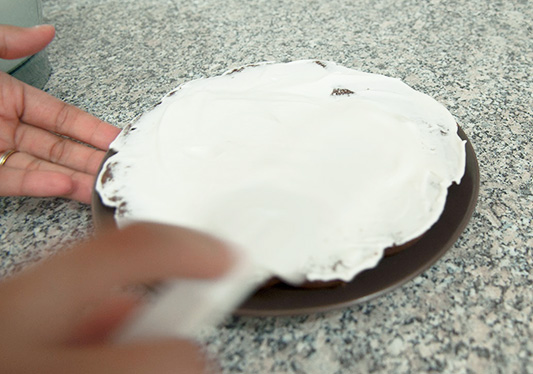 |  |
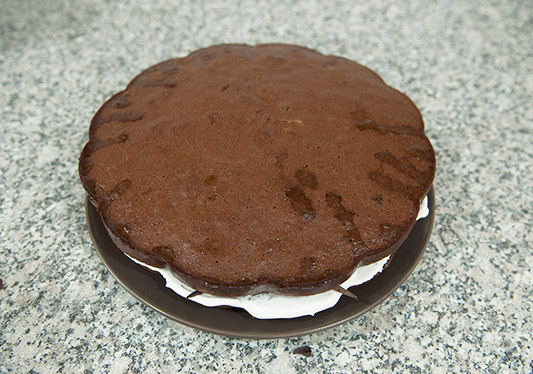
Now carefully place the top moistened layer of cake over the bottom one.
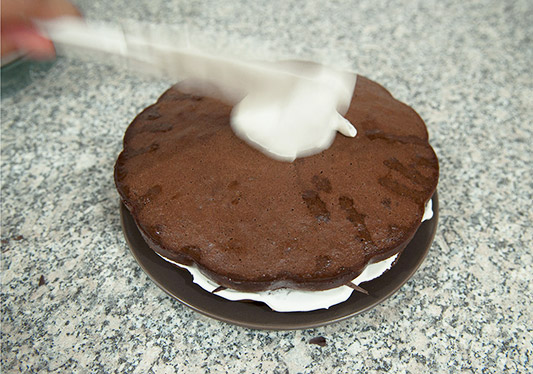
Place another spatula full of cream at the center of the cake and spread it well with a flat spatula.
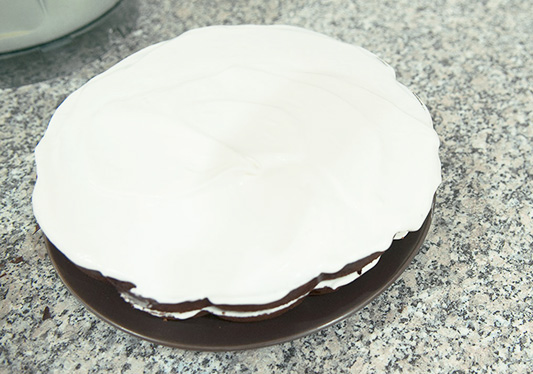
Some also like covering the sides of the cake. If you would like to do that, then add some extra whipped cream on top of the cake and slide it over to the sides with a spatula. This is a much easier way of spreading the cream on the sides without making the cake messy.
Place another spatula full of cream at the center of the cake and spread it well with a flat spatula.
Some also like covering the sides of the cake. If you would like to do that, then add some extra whipped cream on top of the cake and slide it over to the sides with a spatula. This is a much easier way of spreading the cream on the sides without making the cake messy.
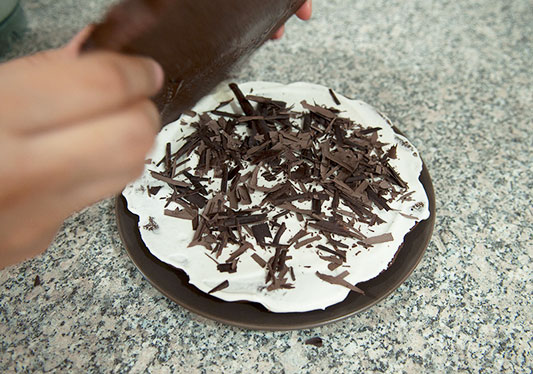 |  |  |  |
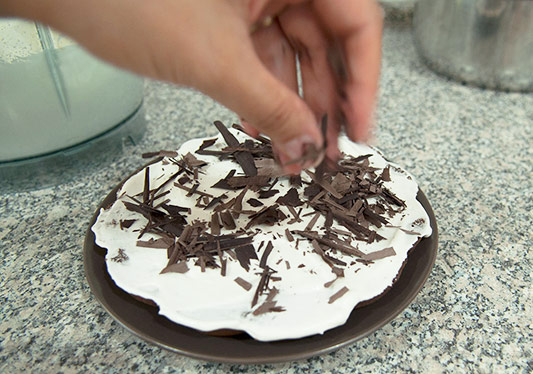
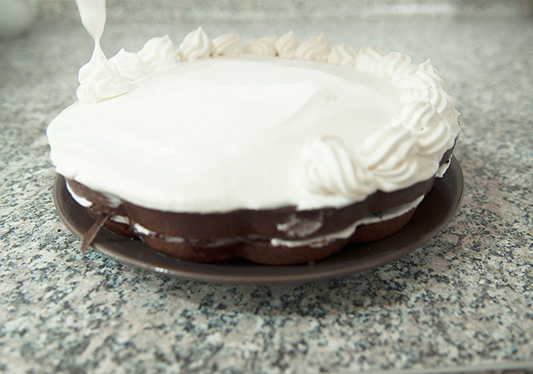
Using the piping bag, make small 1’’ diameter swirls to decorate the edges of the cake. Once that is done, add the chilled chocolate shavings to the top and garnish with a cherry (optional).
 | 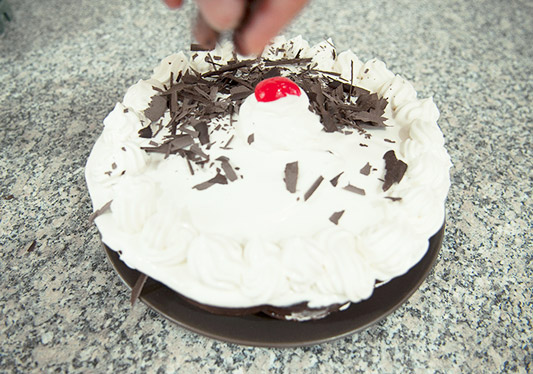 |
Refrigerate for at least 2 – 3 hours before serving.
MY NOTES
Make sure the eggs and the sugar mixture that is to be cooked on the bain marie have become at least luke warm, or else they would collapse while whisking.
Worst come worst, even if the eggs collapse, don't worry, the cake, instead of becoming light and aerated, it would turn out like a brownie, which tastes awesome too!
Make sure the whipped cream is chilled, or else it wont form good steady stiff peaks and would collapse in no time.
 RSS Feed
